> ## Documentation Index
> Fetch the complete documentation index at: https://help.berocker.com/llms.txt
> Use this file to discover all available pages before exploring further.
# QuickBooks Integration
> Learn how to connect QuickBooks to BeRocker CRM to securely process payments.
BeRocker allows you to connect your QuickBooks account so you can securely process payments directly through your CRM.\
BeRocker does **not** store or handle transactions. Instead, payment details are securely forwarded to QuickBooks—similar to generating an invoice link in QuickBooks and sending it to your customer.
***
## How it works
* Customers add their payment method inside your **Booking Links**.
* When you charge a customer, BeRocker securely routes the payment to QuickBooks.
* QuickBooks processes the transaction and applies any processing fees.
* Funds are deposited directly into your QuickBooks account.
***
## Steps
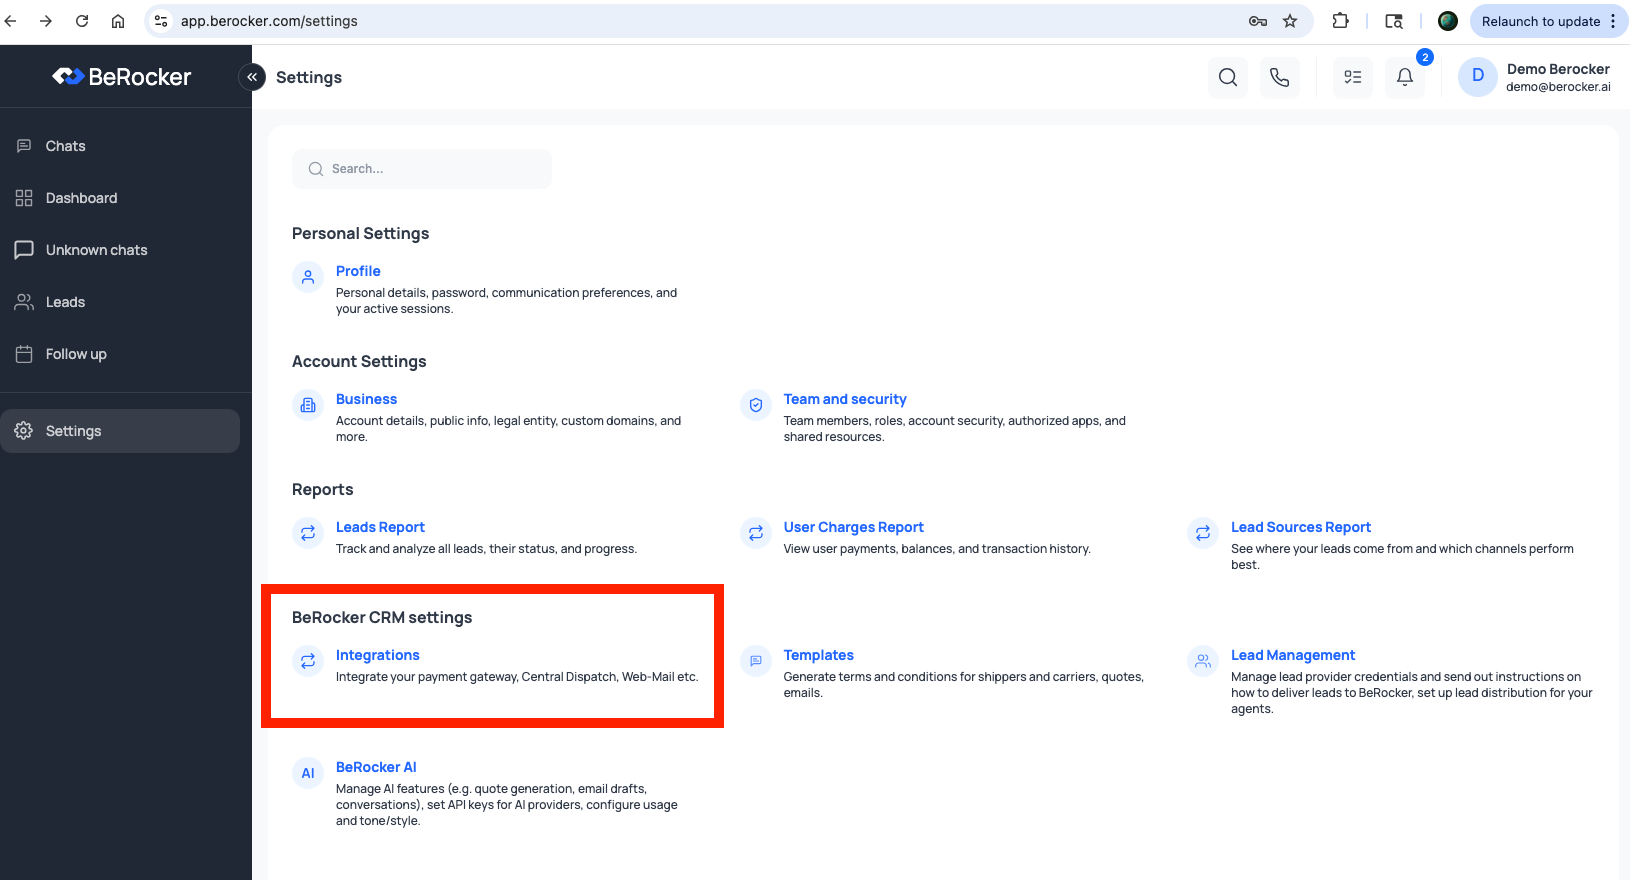
### 1. Open your BeRocker Dashboard
* Log in to [app.berocker.com](https://app.berocker.com).
* From the left menu, go to **Settings**.
 ### 2. Configure Payment Gateway
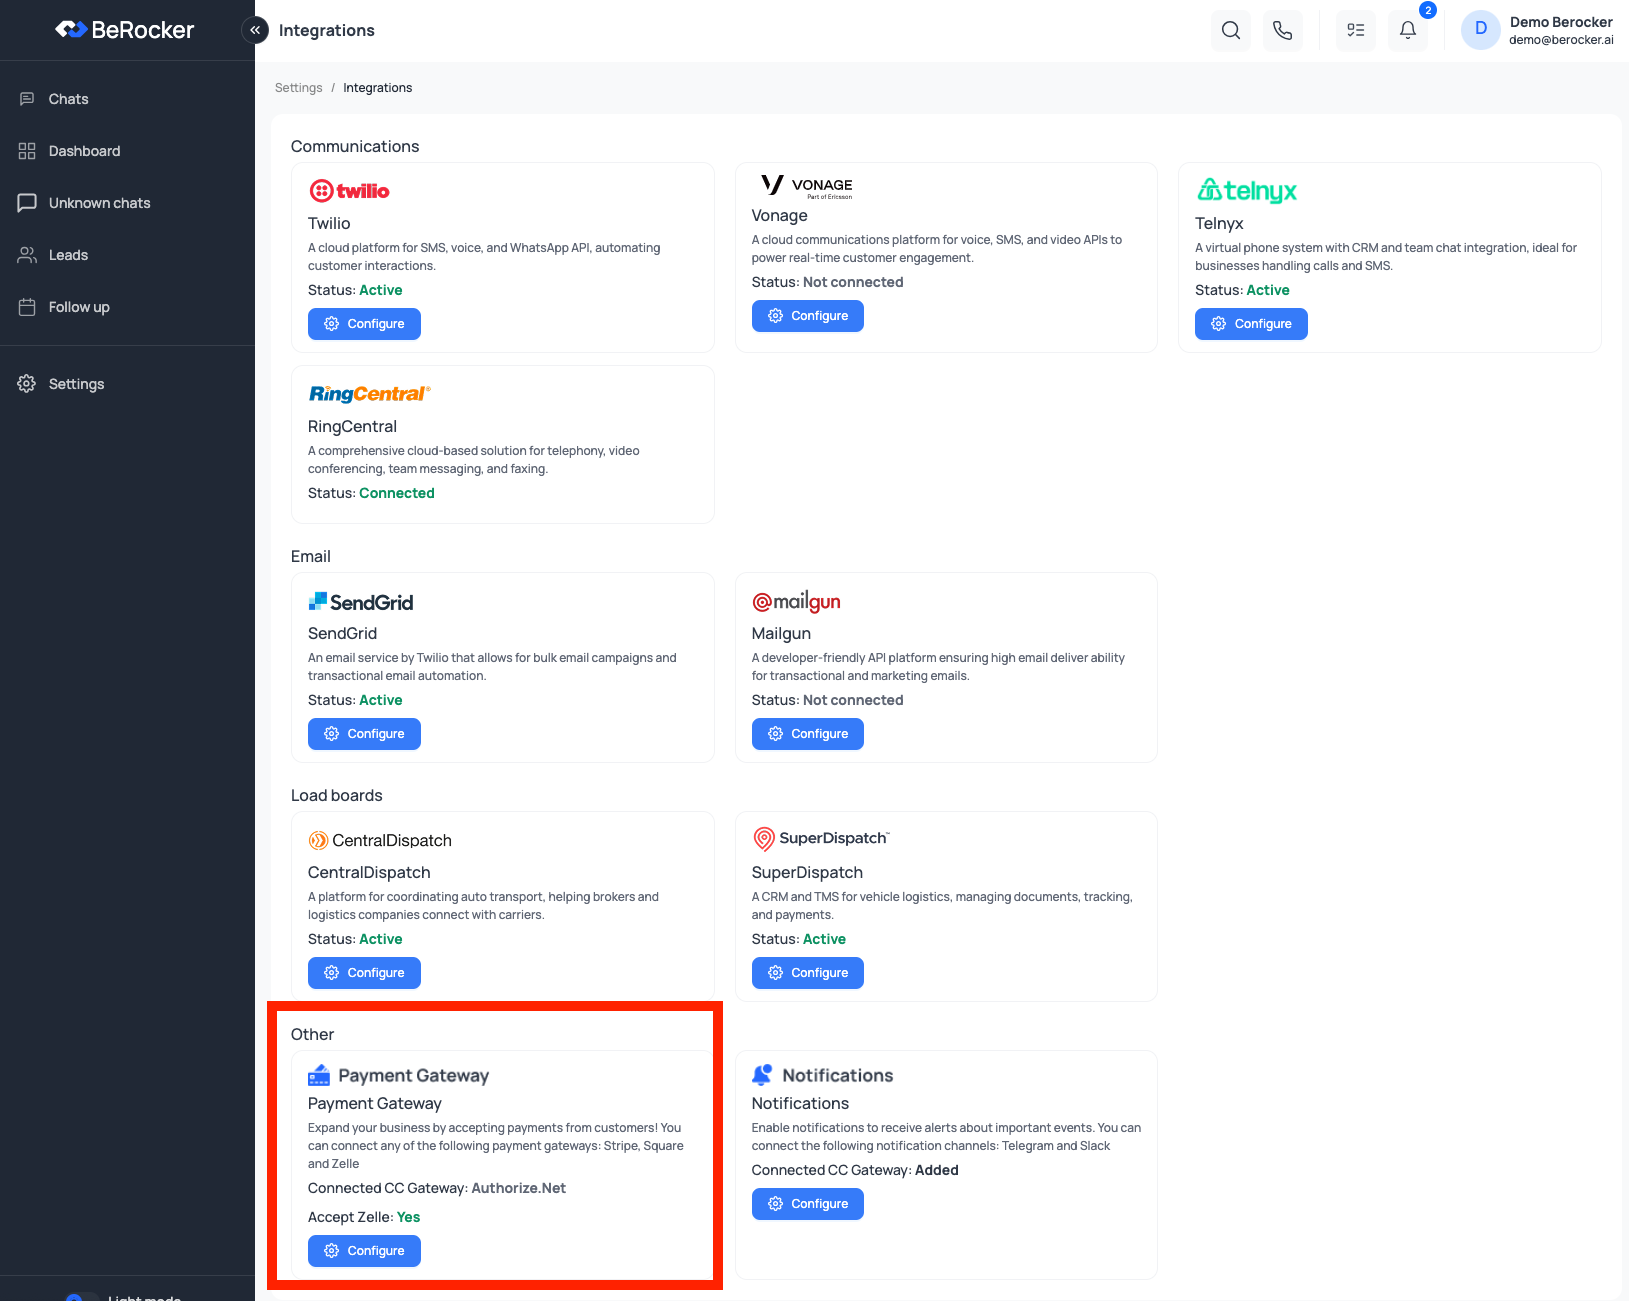
* In the **Settings** page, click **Configure** under **Payment Gateway**.
* Scroll down to the **QuickBooks** option.
### 2. Configure Payment Gateway
* In the **Settings** page, click **Configure** under **Payment Gateway**.
* Scroll down to the **QuickBooks** option.
 ### 3. Set QuickBooks Preferences
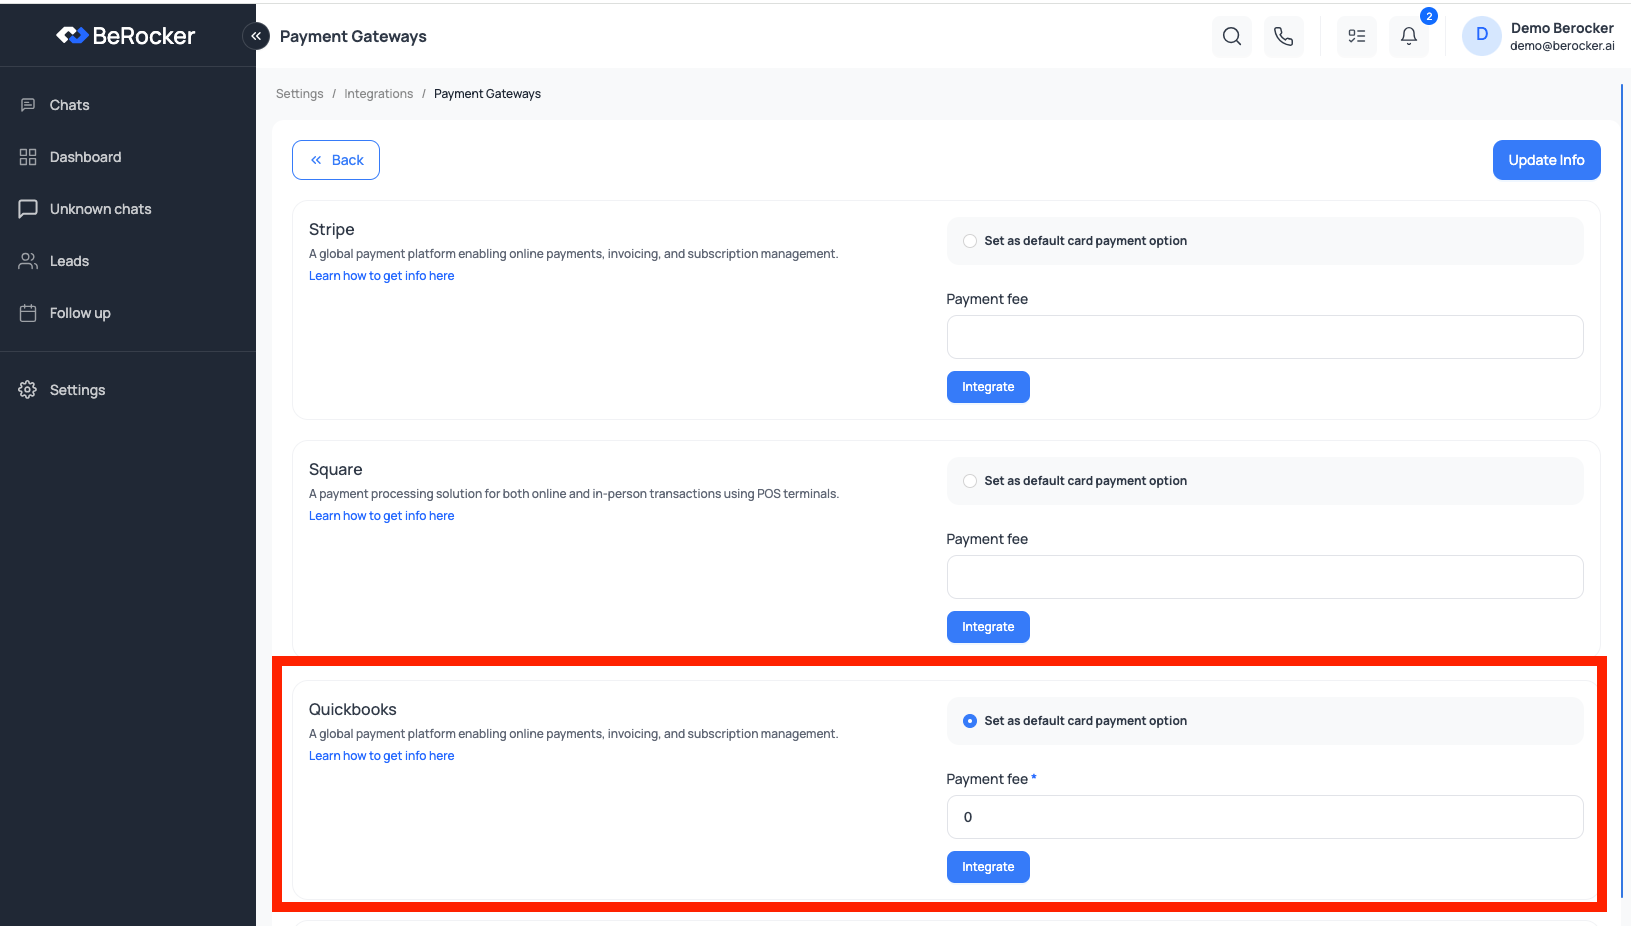
* Select **Set as default card payment option**.
* Enter a value in the **Payment Fee** input.
* Example: If QuickBooks charges a 2% processing fee, enter `2`.
* The system will automatically add this fee to each transaction to cover your expenses.
* Click **Integrate**.
### 3. Set QuickBooks Preferences
* Select **Set as default card payment option**.
* Enter a value in the **Payment Fee** input.
* Example: If QuickBooks charges a 2% processing fee, enter `2`.
* The system will automatically add this fee to each transaction to cover your expenses.
* Click **Integrate**.
 ### 4. Connect to QuickBooks
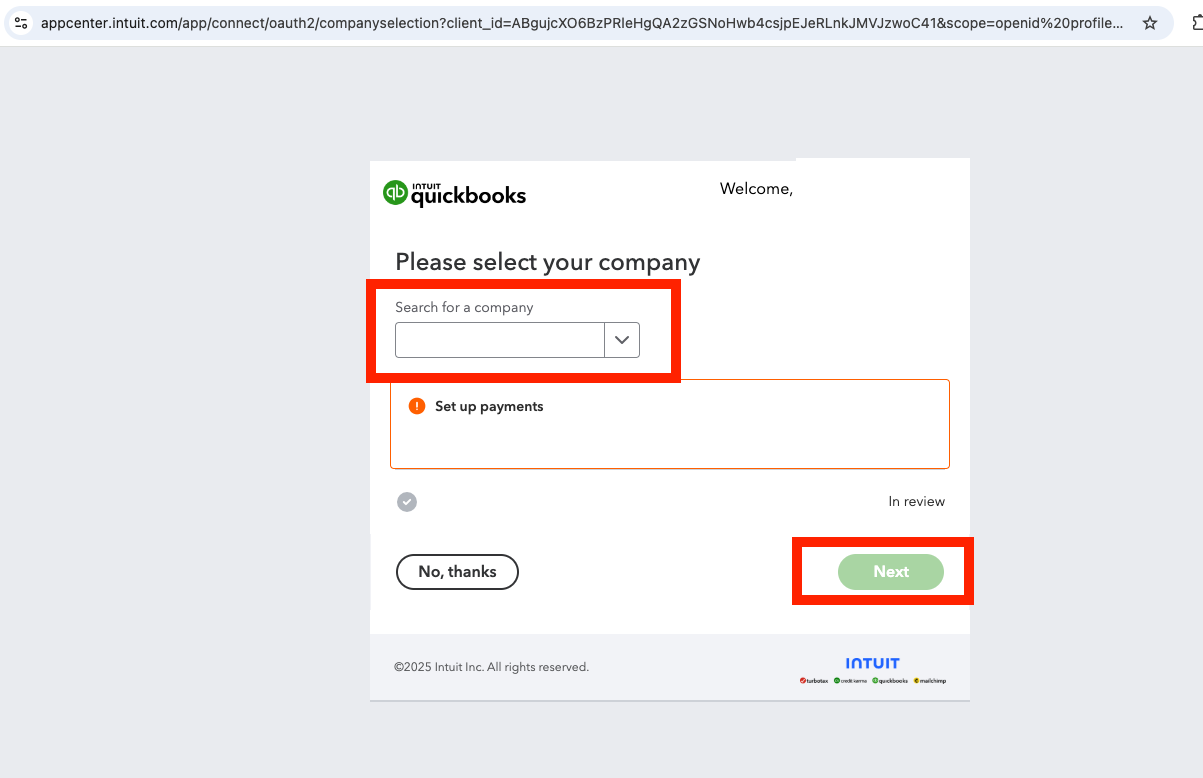
* You’ll be redirected to the QuickBooks OAuth page.
* Log in using your QuickBooks credentials.
* Select your business from the dropdown list.
* Click **Next** to return to BeRocker CRM.
### 4. Connect to QuickBooks
* You’ll be redirected to the QuickBooks OAuth page.
* Log in using your QuickBooks credentials.
* Select your business from the dropdown list.
* Click **Next** to return to BeRocker CRM.
 ### 5. Done!
Your QuickBooks account is now integrated with BeRocker. All charges made through the CRM will be processed by QuickBooks and deposited into your account.
***
## Notes
* BeRocker never stores payment details—it simply passes them to QuickBooks securely.
* Processing fees are set by QuickBooks, not BeRocker.
* You can change or disconnect the integration anytime in **Settings > Payment Gateway**.
### 5. Done!
Your QuickBooks account is now integrated with BeRocker. All charges made through the CRM will be processed by QuickBooks and deposited into your account.
***
## Notes
* BeRocker never stores payment details—it simply passes them to QuickBooks securely.
* Processing fees are set by QuickBooks, not BeRocker.
* You can change or disconnect the integration anytime in **Settings > Payment Gateway**.