> ## Documentation Index
> Fetch the complete documentation index at: https://help.berocker.com/llms.txt
> Use this file to discover all available pages before exploring further.
# Sendgrid setup
Setting up SendGrid requires three main steps: **Registering your account, Authenticating your domain, and Generating an API key**. Follow this guide to complete each stage.
***
## 1. Register for SendGrid Account
Visit [SendGrid Sign-Up](https://signup.sendgrid.com/). Choose **Domain Authentication**
(recommended for businesses).
Enter your **name, company name, email, and password**. Agree to the terms and click **Create
Account**.
Check your inbox for a **SendGrid verification email**. Click the verification link to activate
your account.
After confirming, log in at [SendGrid Dashboard](https://app.sendgrid.com/). You’re now ready to
set up domain authentication.
Additional articles: [Official: How to Create a SendGrid Account
](https://support.sendgrid.com/hc/en-us/articles/35394877582235-How-to-Create-a-SendGrid-Account)
***
## 2. Authenticate Your Domain
Domain authentication ensures your emails are trusted and not flagged as spam. It also removes the “via sendgrid.net” label from your messages.
In the left sidebar, go to **Settings → Sender Authentication**.
Click **Get Started** under **Domain Authentication**. Enter your **domain name** (e.g.,
`yourcompany.com`).
Choose your DNS provider (e.g., Cloudflare, GoDaddy, Google Domains). If not listed, select
**Other Host (Manual Setup)**.
SendGrid will generate **CNAME records**. Copy and paste these into your DNS provider’s
settings. Wait up to 24–48 hours for propagation.
Go back to the SendGrid dashboard and click **Verify**. Once successful, your domain will show
as **Authenticated**.
## 3. Generate an API Key
An API key is required for integration with applications (e.g., CRMs, servers, or custom apps).
From the left sidebar, click **Settings → API Keys**.
Click **Create API Key** and give it a clear name (e.g., “Production Mail”).
* **Full Access**: Grants all permissions (not recommended unless required). - **Restricted
Access**: Recommended — select only what you need, e.g., **Mail Send**. - **Read Access**:
View-only.
Click **Create & View**. Copy the key immediately (example: `SG.xxxxx.yyyyy`). Store it securely
in environment variables or a secret manager.
##
***
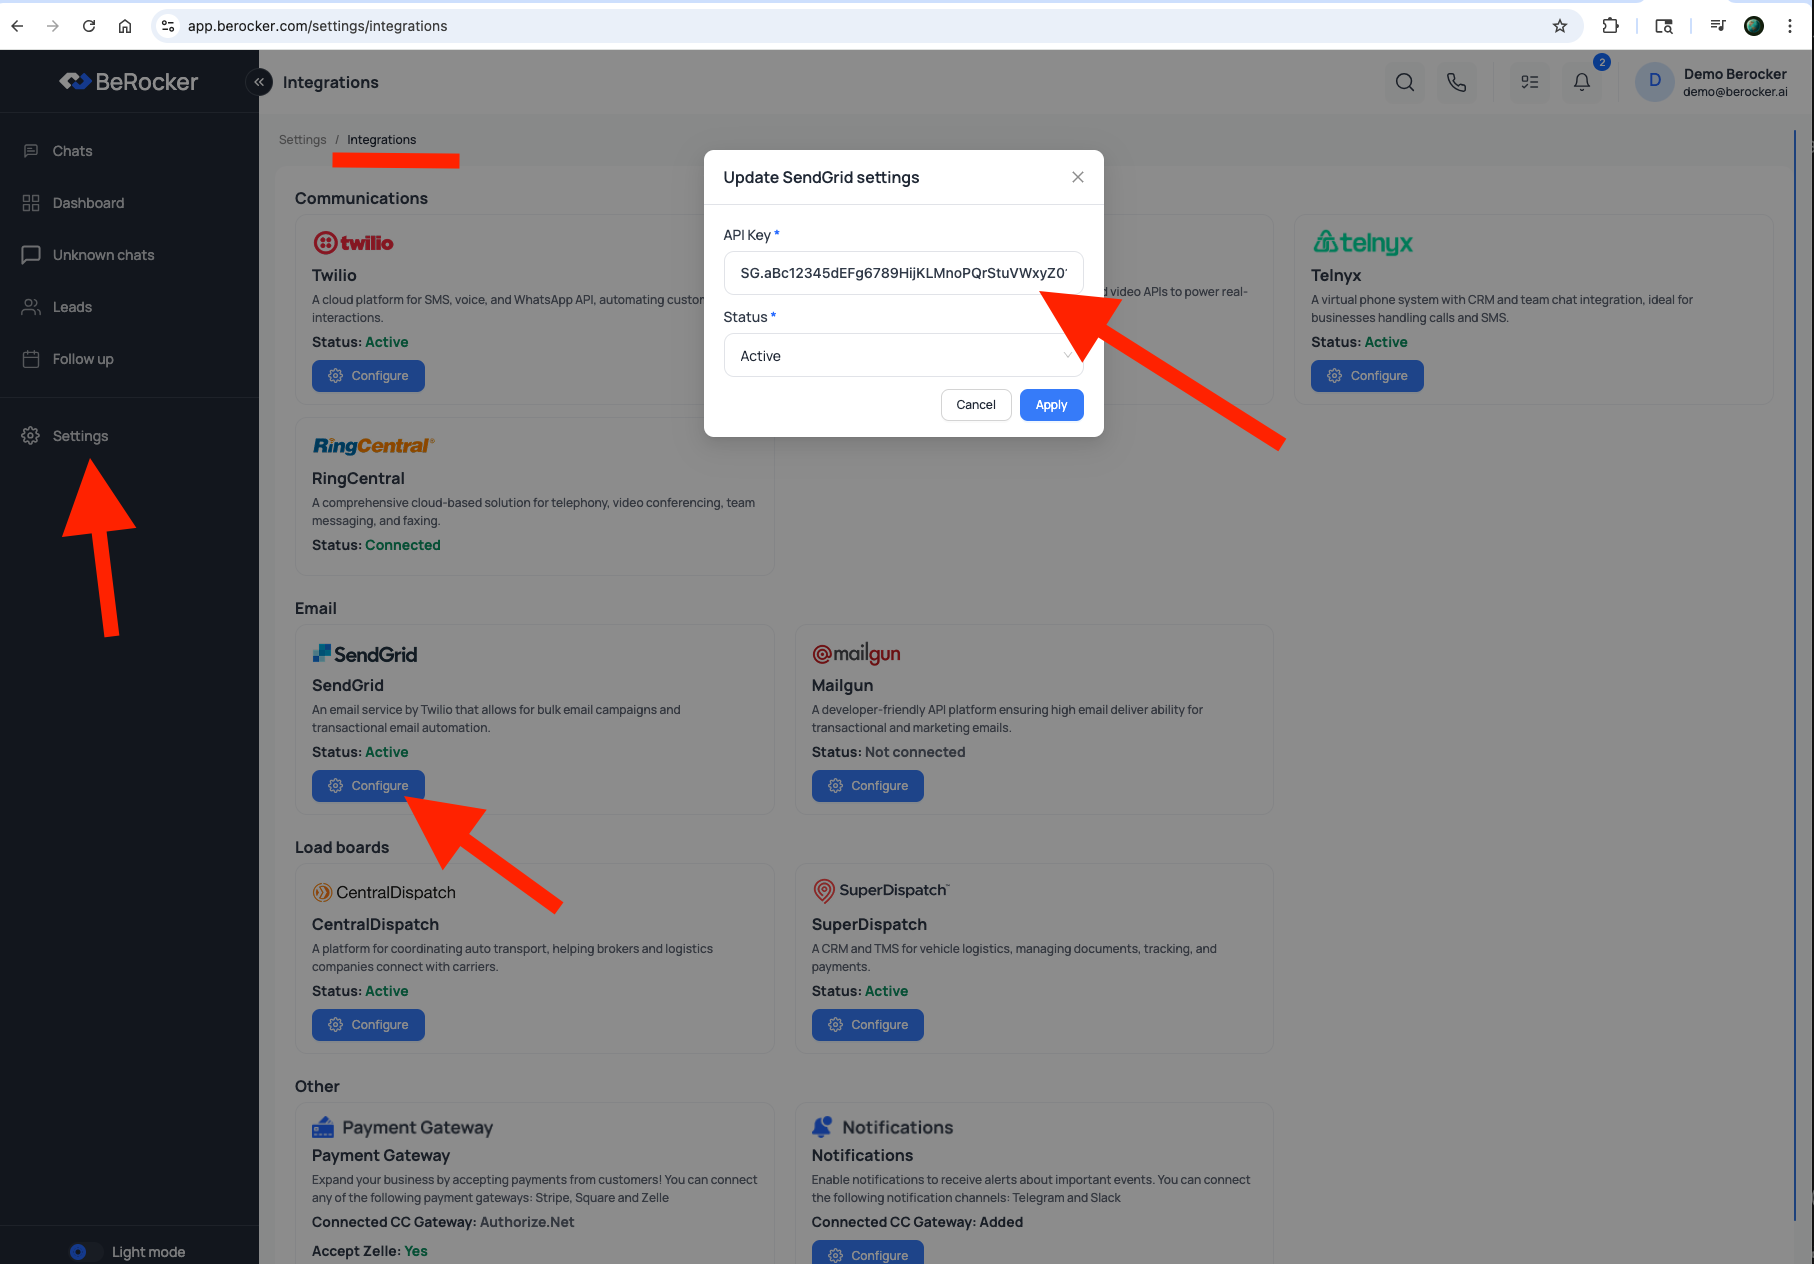
## 4. Connect SendGrid to BeRocker
Log in to your [BeRocker Dashboard](https://app.berocker.com).
Navigate to **Settings → Integrations** from the sidebar menu.
Locate the **SendGrid integration** item. Click **Configure** to open the setup window.
Paste your generated SendGrid API key into the **API Key** field. Set the status to **Active**.
Click **Apply** to save your configuration. Your BeRocker system will now send emails using your
authenticated SendGrid account.
##