> ## Documentation Index
> Fetch the complete documentation index at: https://help.berocker.com/llms.txt
> Use this file to discover all available pages before exploring further.
# Business Info
## Set Up Your Business Info for Contracts & Branding
Before sending quotes, contracts, or emails to shippers and carriers, you need to configure your Business Settings in BeRocker. This includes your contact info, branding, and legal links — all of which appear in outgoing documents and messages.
## Step 1: Go to Business Settings
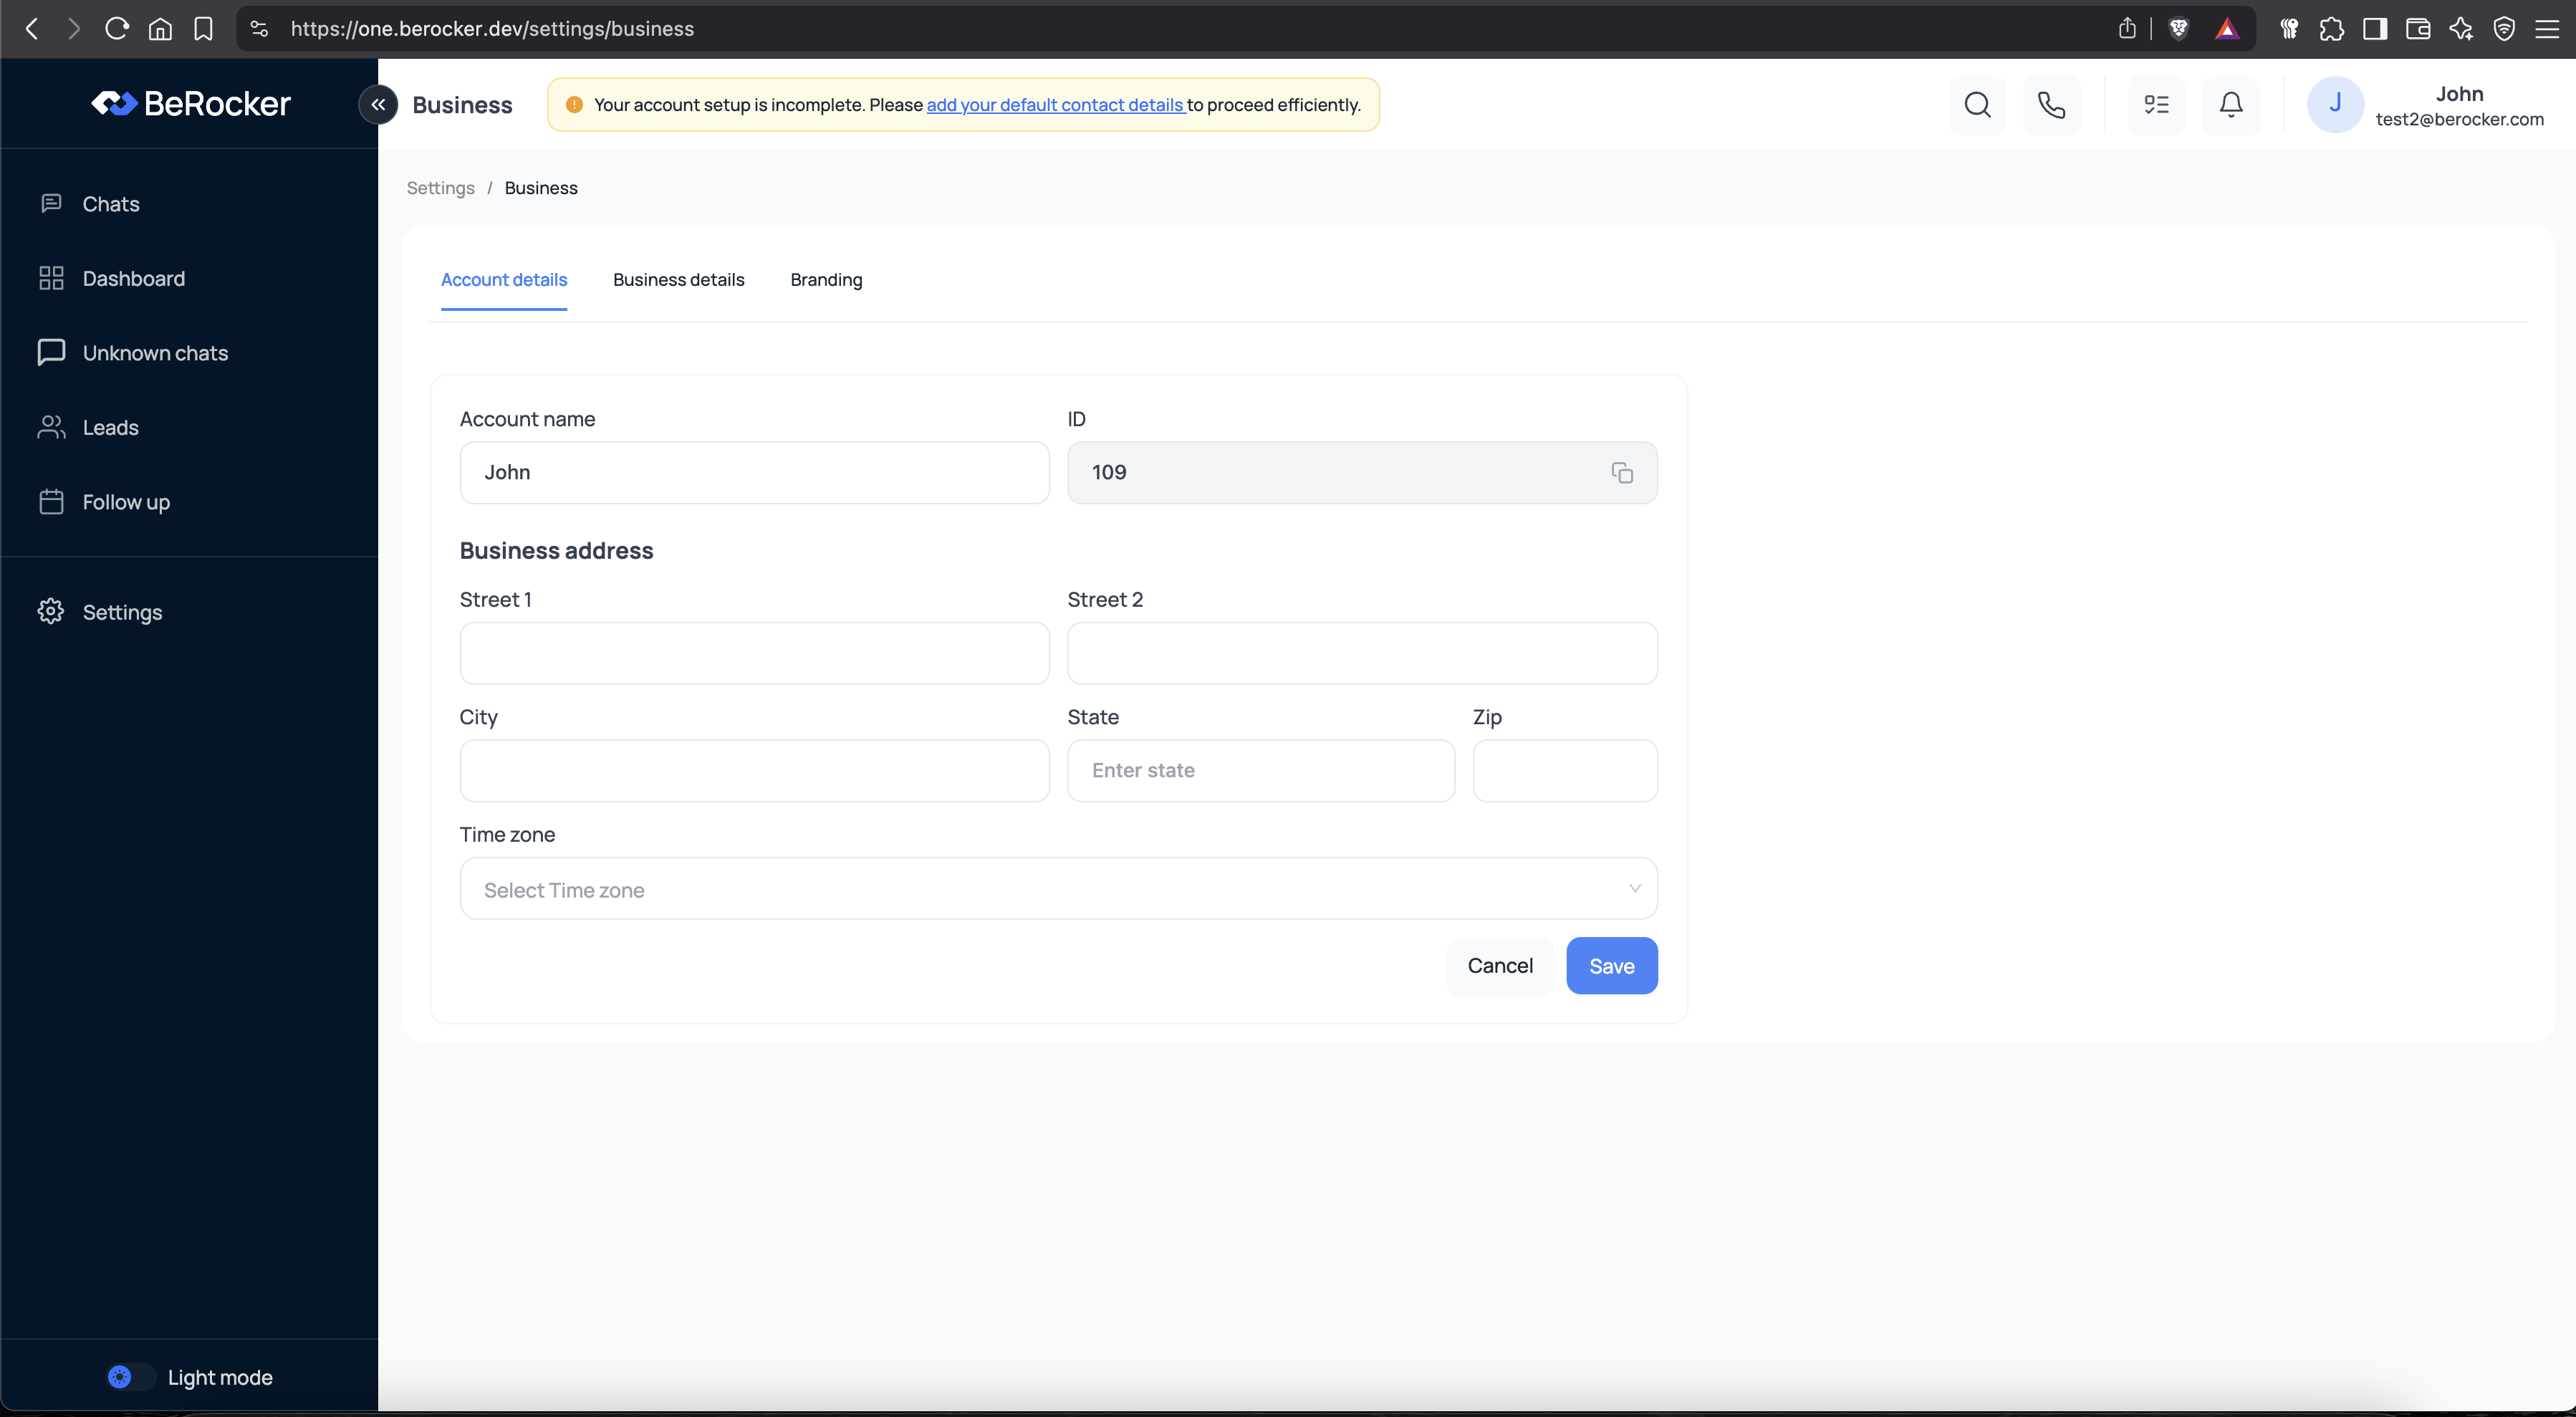 *Business Settings*
* From the sidebar, click Settings
* Then select Business
You'll see three tabs:
* Account details – Contact info and timezone
* Business details – Legal & public company info
* Branding – Logos, brand color, and visual identity
*Business Settings*
* From the sidebar, click Settings
* Then select Business
You'll see three tabs:
* Account details – Contact info and timezone
* Business details – Legal & public company info
* Branding – Logos, brand color, and visual identity
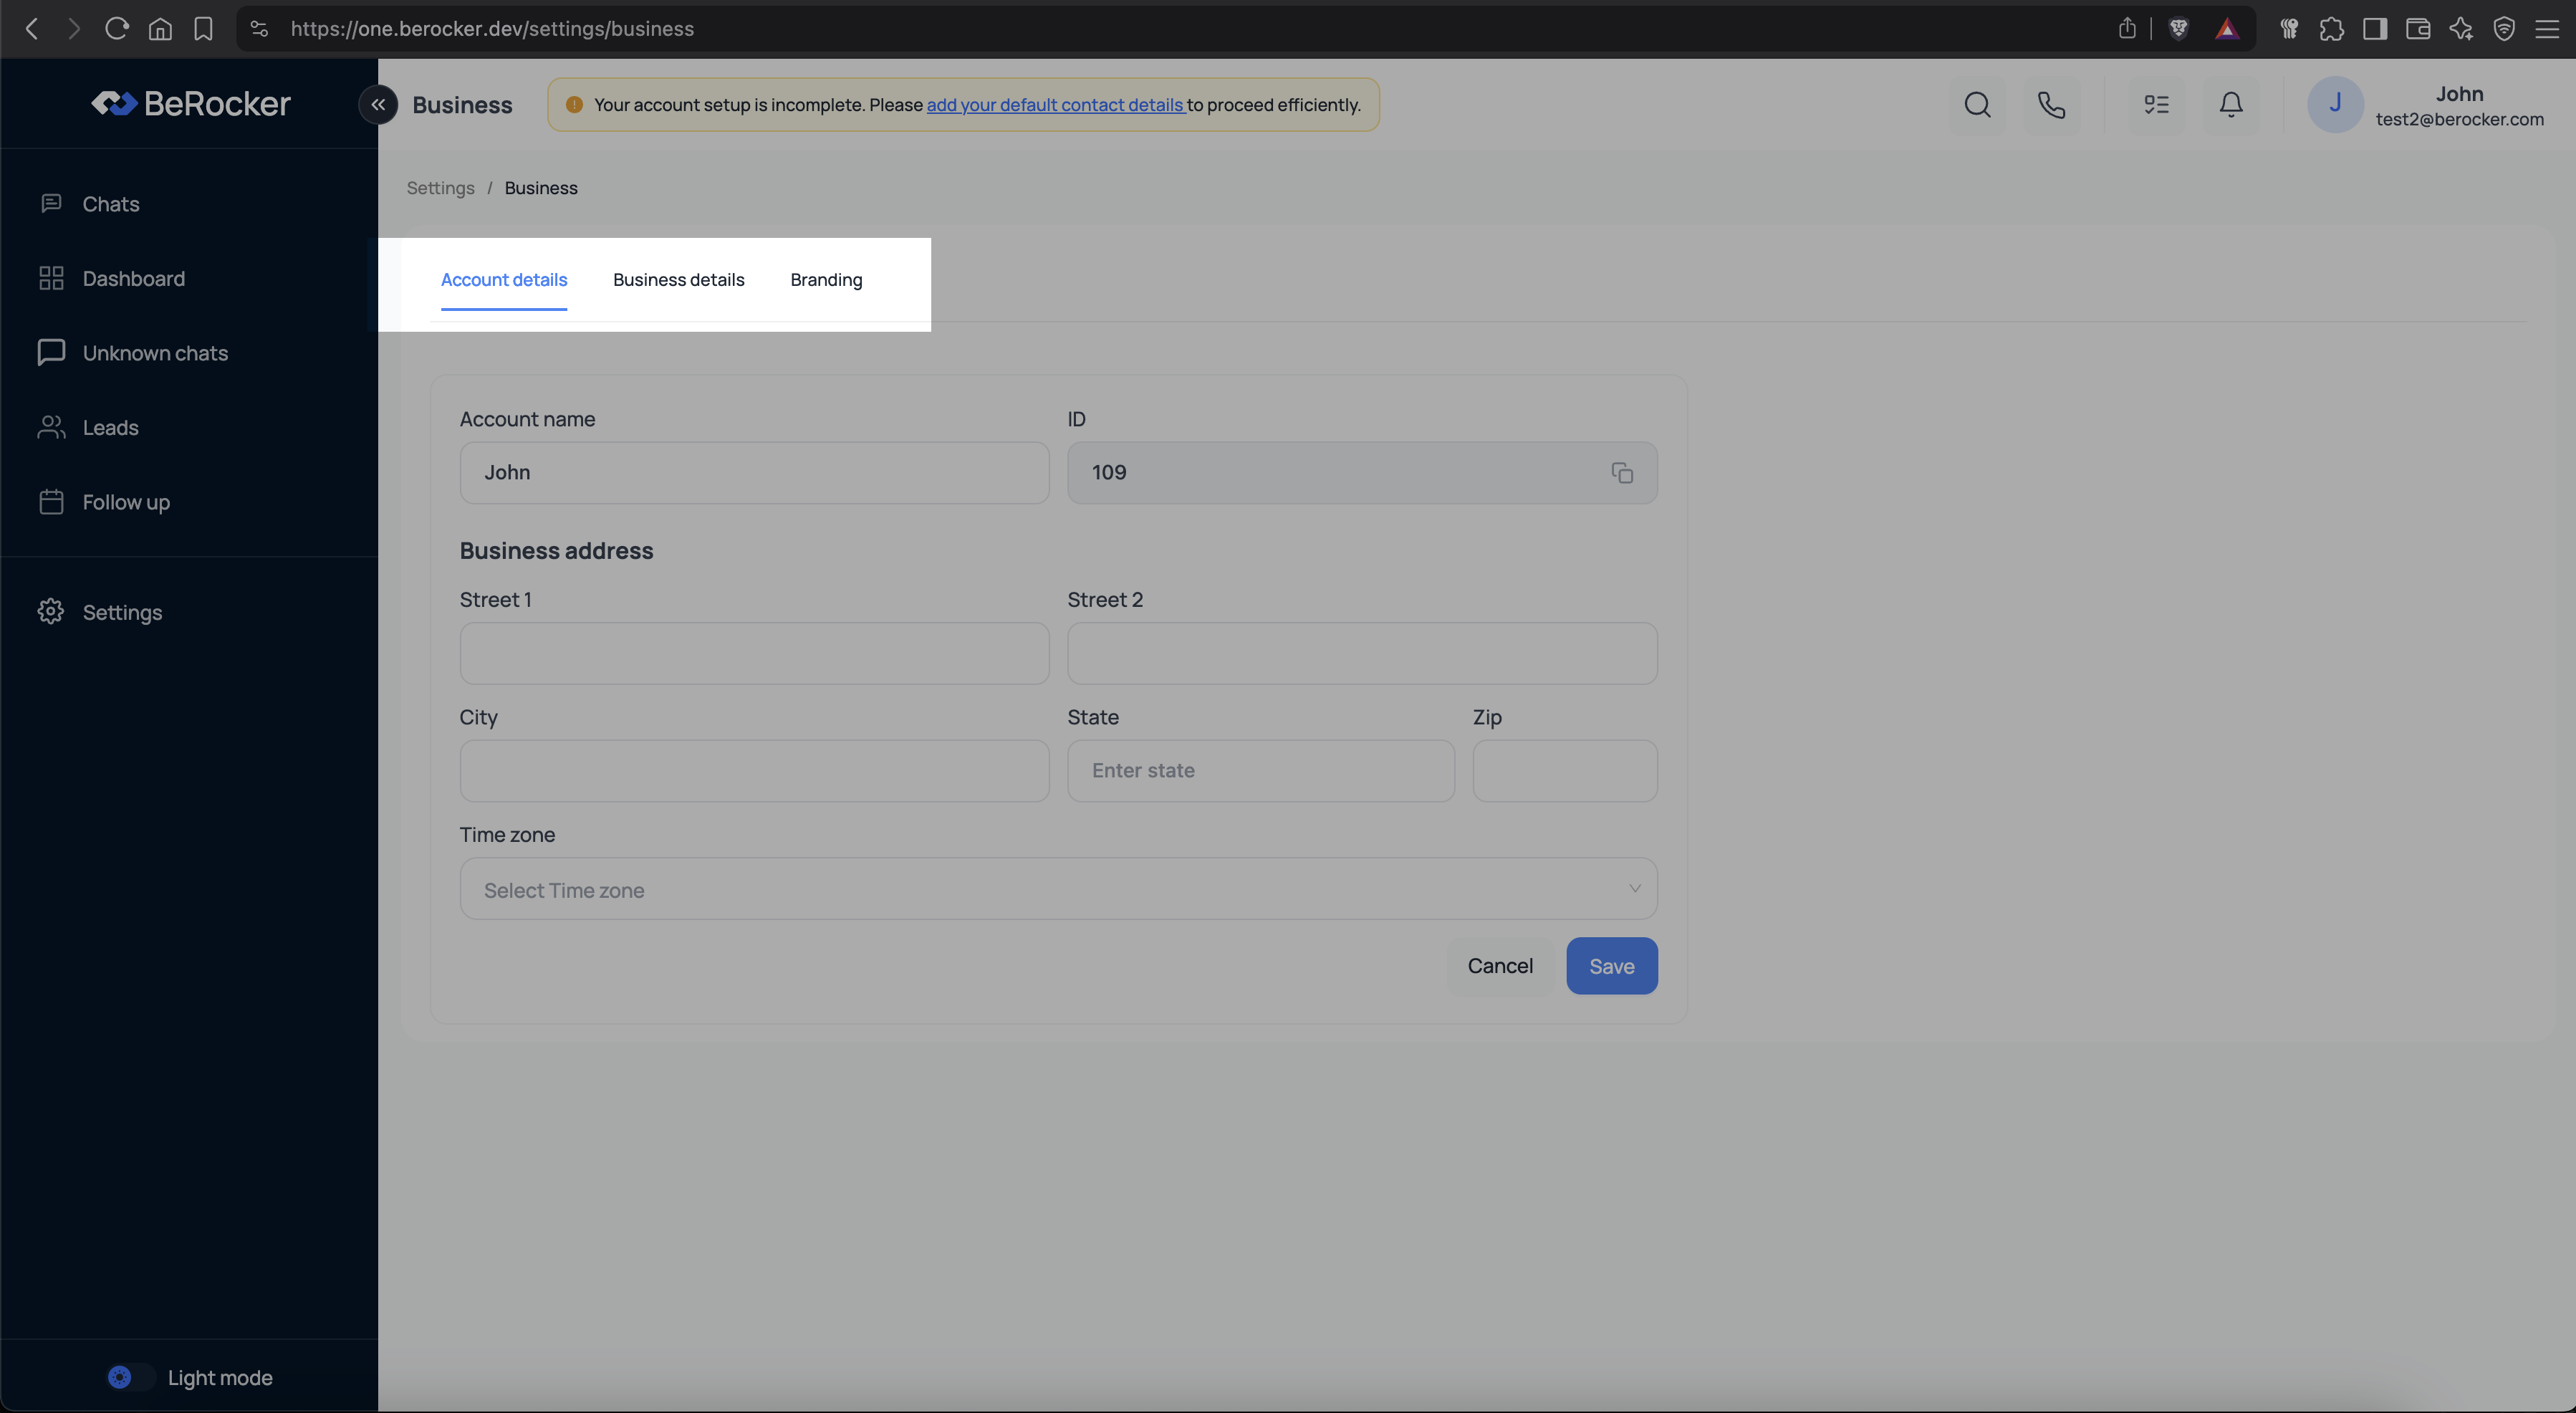 *Tabs*
## Step 2: Fill in Your Company Info
Under the Account details tab:
* Account name: Your business or brand name
* Business address: Fill in your full legal address
* Time zone: Select your local time zone (used for automation and scheduling)
> This data is used in contracts, quote PDFs, and email headers.
## Step 3: Add Legal & Public Details
Go to the Business details tab to:
*Tabs*
## Step 2: Fill in Your Company Info
Under the Account details tab:
* Account name: Your business or brand name
* Business address: Fill in your full legal address
* Time zone: Select your local time zone (used for automation and scheduling)
> This data is used in contracts, quote PDFs, and email headers.
## Step 3: Add Legal & Public Details
Go to the Business details tab to:
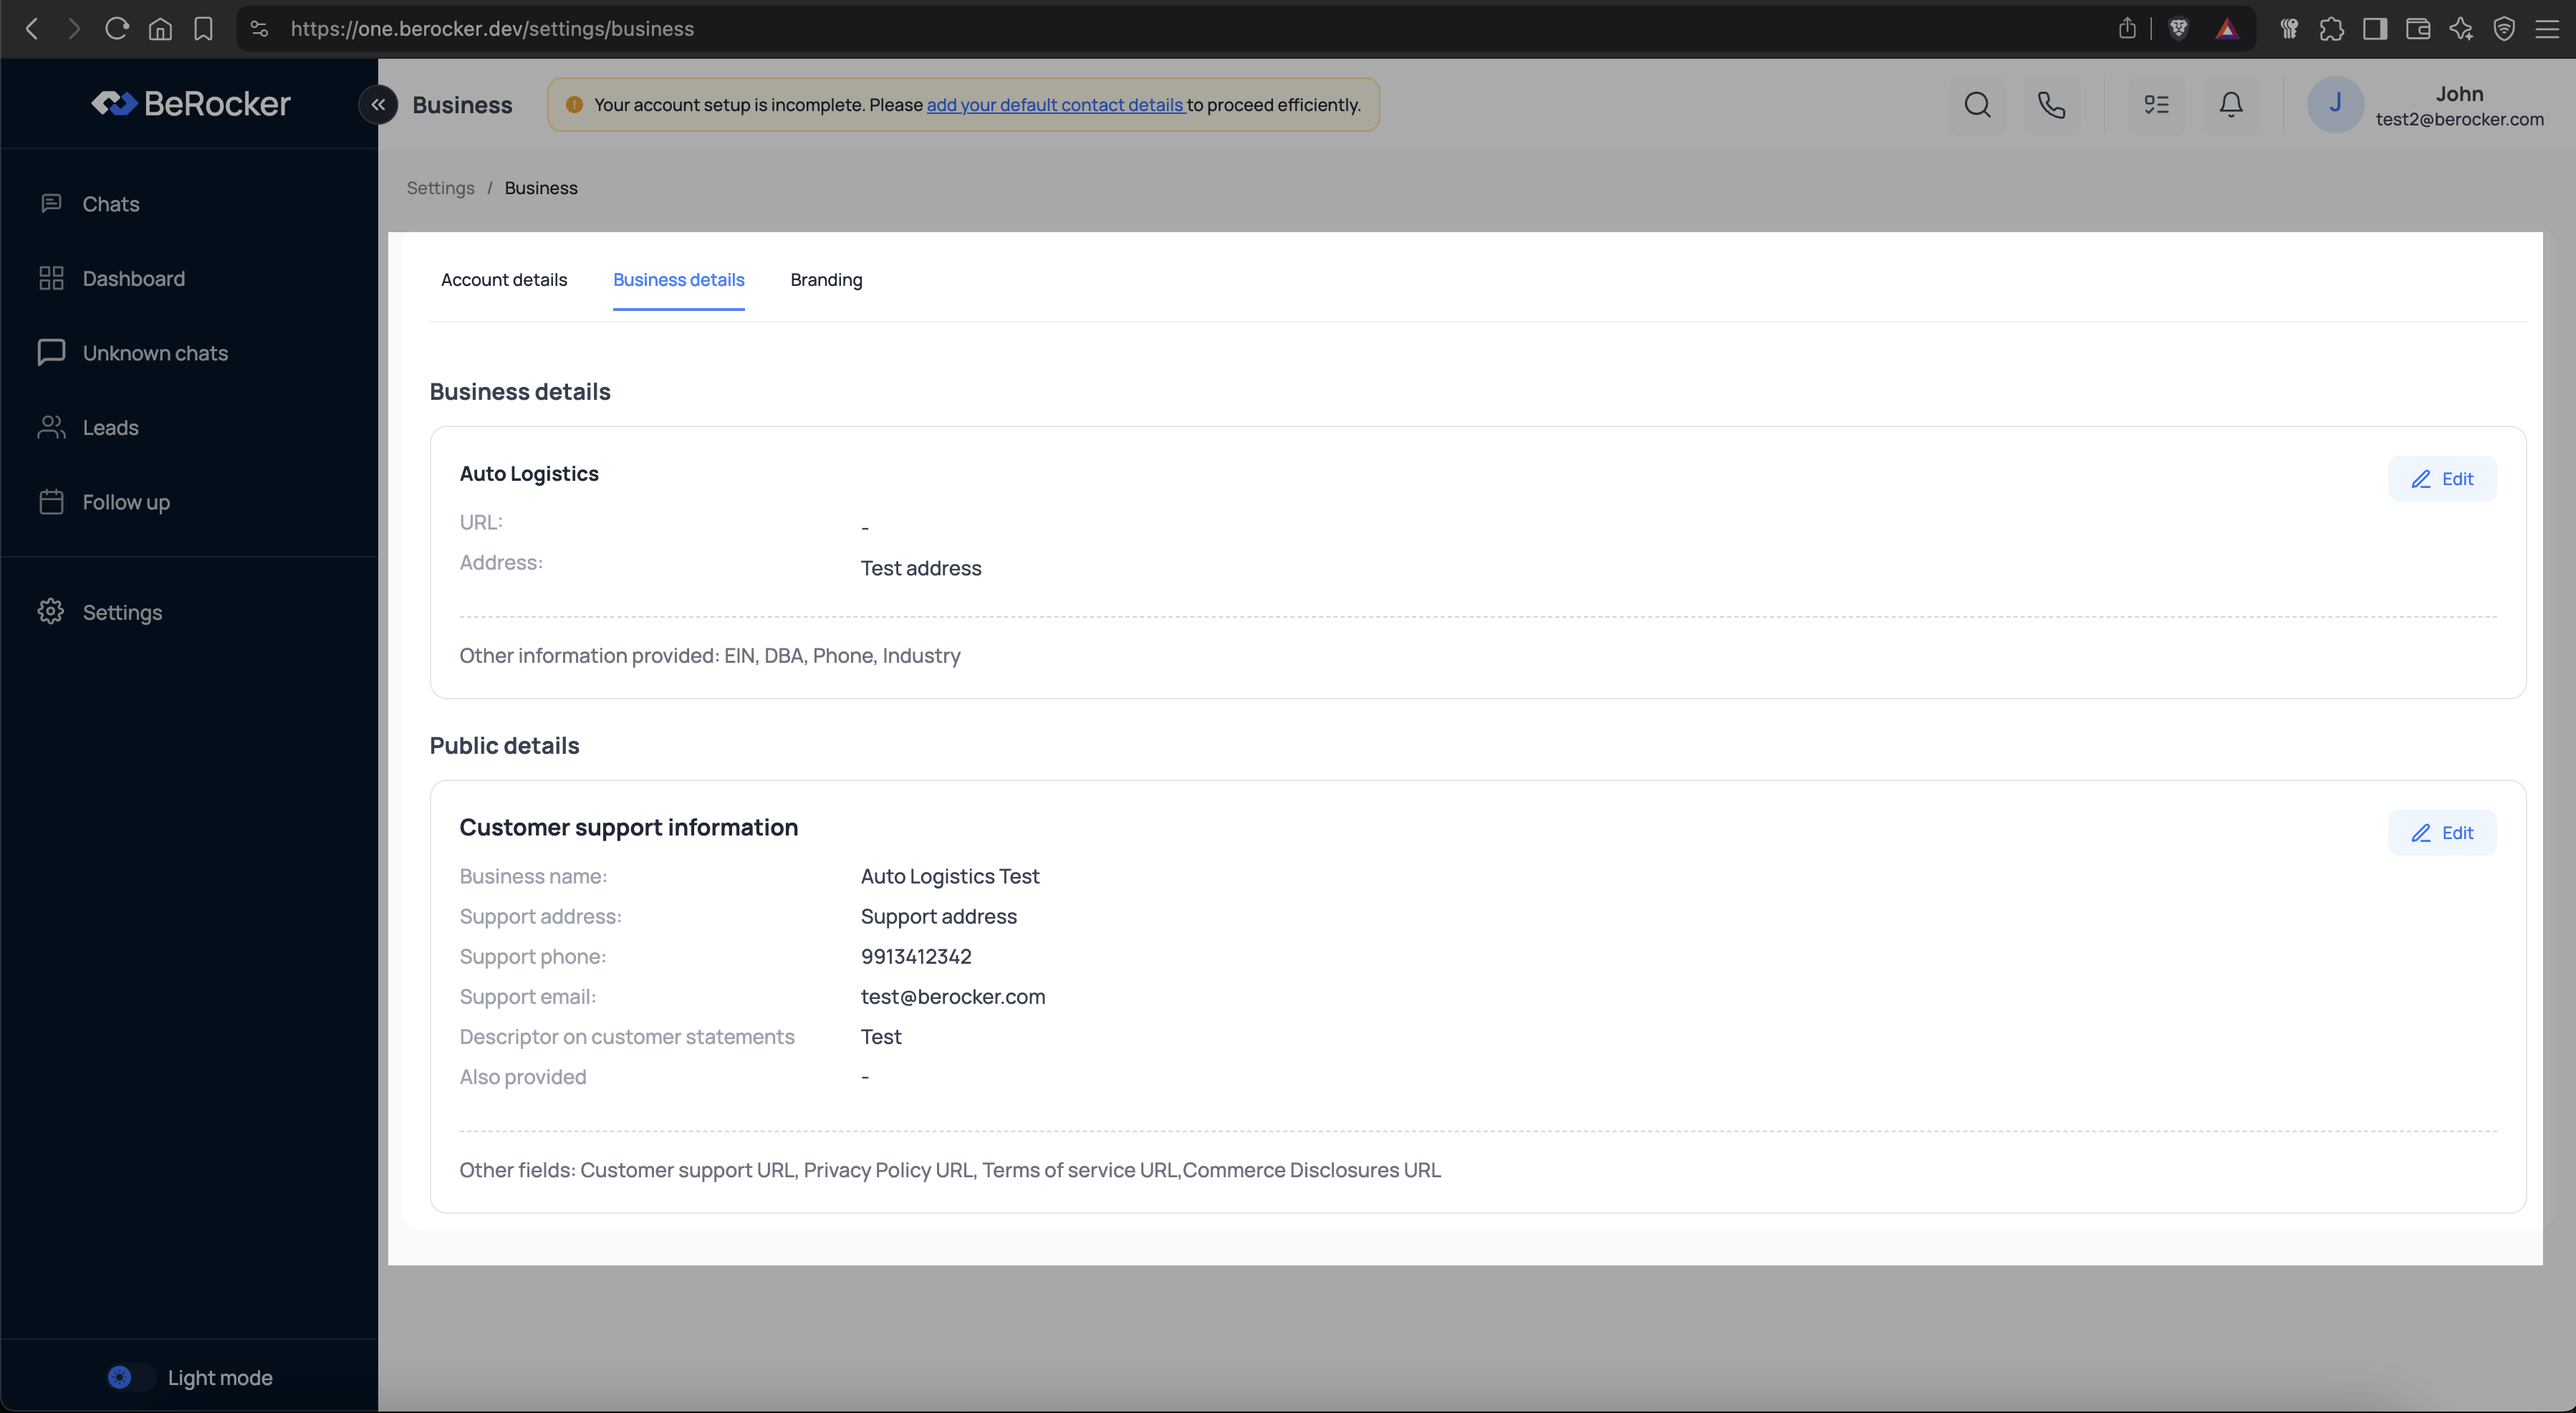 *Business details*
* Add links to your Terms of Service, Privacy Policy, or Refund Policy
* Specify your legal entity name, if different from your brand name
* Define your business email and support contact
> These links are displayed on invoices, payment pages, and emails.
## Step 4: Upload Branding Assets
Open the Branding tab:
*Business details*
* Add links to your Terms of Service, Privacy Policy, or Refund Policy
* Specify your legal entity name, if different from your brand name
* Define your business email and support contact
> These links are displayed on invoices, payment pages, and emails.
## Step 4: Upload Branding Assets
Open the Branding tab:
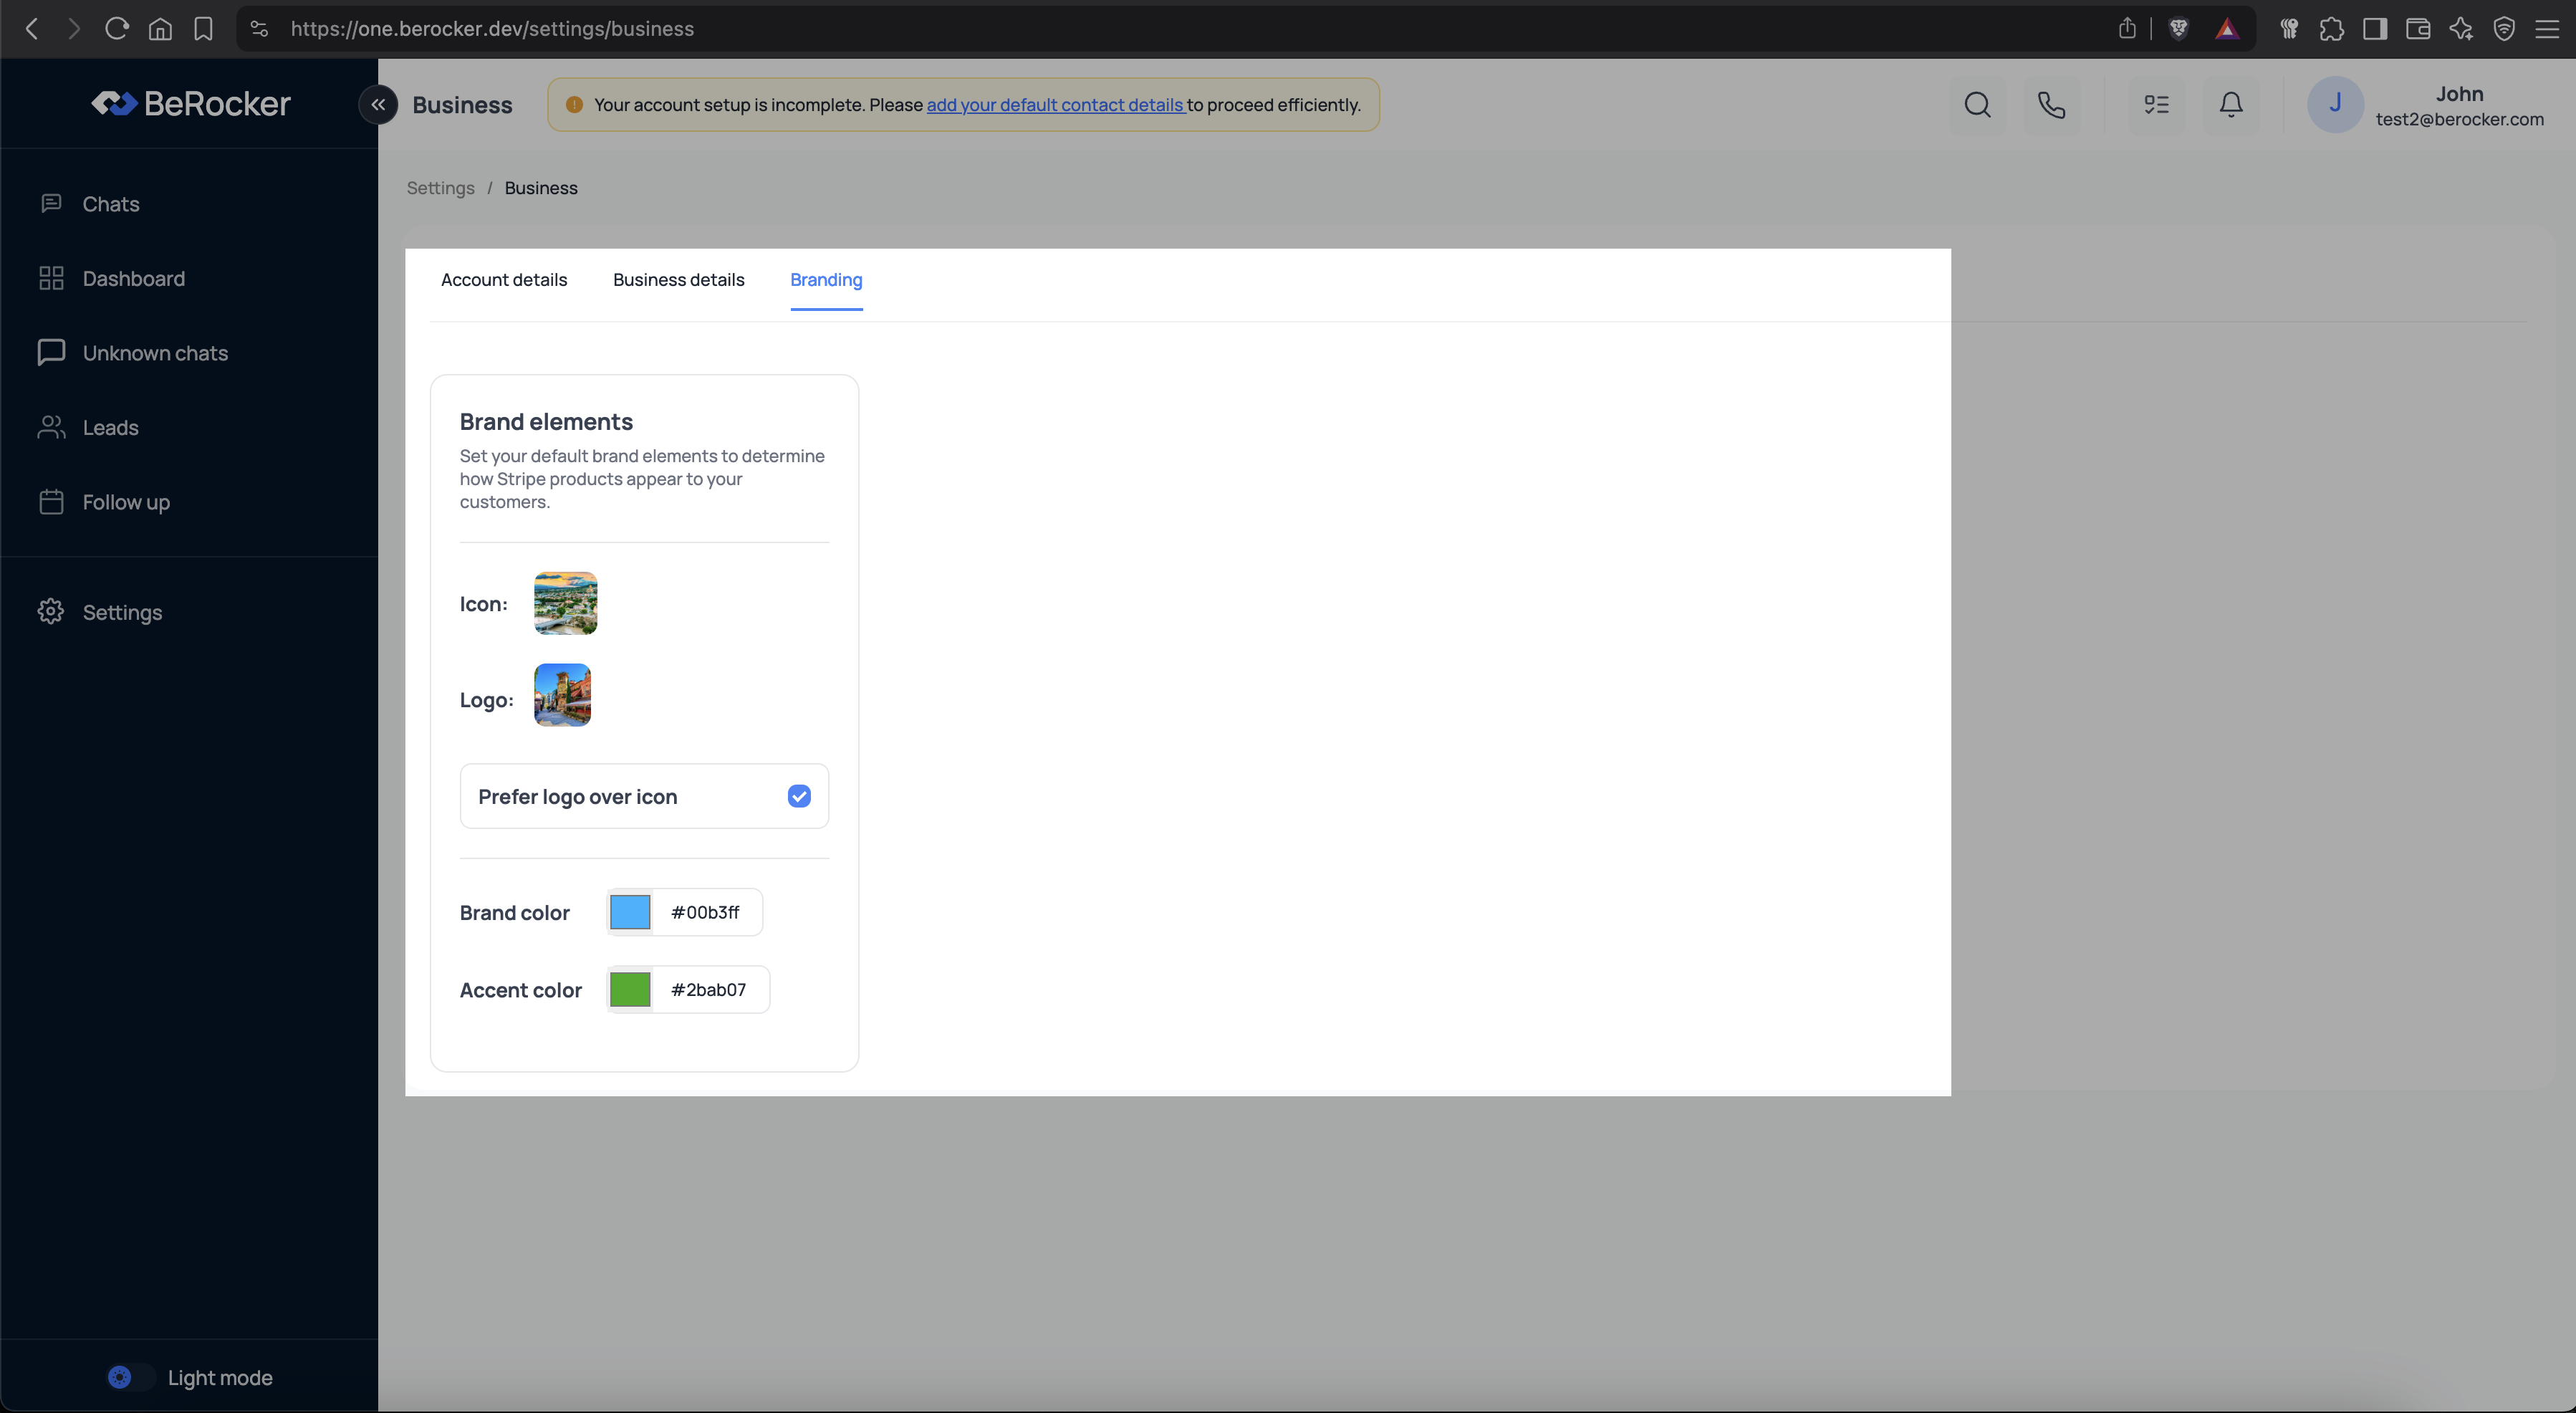 *Branding tab*
* Upload your logo (recommended for email templates and documents)
* Add an icon (used in compact views)
* Choose a brand color (e.g. your main blue or red)
* Set an accent color (for highlights and buttons)
Enable 'Prefer logo over icon' if your logo includes your business name or tagline.
## Why This Matters
Your business settings are automatically used in:
* Contracts and quotes sent to carriers and shippers
* Email templates, notifications, and task reminders
* Stripe and payment gateway interfaces
* Internal branding for your agents
Skipping this step means documents and emails may look unprofessional or contain missing data.
## Pro Tips
* Use a square icon for best visual results
* Brand color affects buttons and links in email templates
* Set the correct time zone to avoid task and follow-up misfires
## Final Checklist
* Business name and address entered
* Time zone selected
* Logo and colors set
* Legal links added (if available)
Once this setup is done, you’re ready to send professional, branded documents through BeRocker.
*Branding tab*
* Upload your logo (recommended for email templates and documents)
* Add an icon (used in compact views)
* Choose a brand color (e.g. your main blue or red)
* Set an accent color (for highlights and buttons)
Enable 'Prefer logo over icon' if your logo includes your business name or tagline.
## Why This Matters
Your business settings are automatically used in:
* Contracts and quotes sent to carriers and shippers
* Email templates, notifications, and task reminders
* Stripe and payment gateway interfaces
* Internal branding for your agents
Skipping this step means documents and emails may look unprofessional or contain missing data.
## Pro Tips
* Use a square icon for best visual results
* Brand color affects buttons and links in email templates
* Set the correct time zone to avoid task and follow-up misfires
## Final Checklist
* Business name and address entered
* Time zone selected
* Logo and colors set
* Legal links added (if available)
Once this setup is done, you’re ready to send professional, branded documents through BeRocker.